
Before you begin
The purpose of this guide is to make it easier to install Apache Guacamole 1.1.0 on Debian 10. If you find it usefull or if you find some kind of error, please leave a comment.
Apache Guacamole is a convenient way to connect to your home server from remote. You use your browser, it’s really a fantastic piece of software.
Please note that this guide is intended for use at home or in a test environment, use it with caution. It works on my server – it might not work on yours. Please refeer to the Guacamole manual at any time.
This guide requires basic knowledge of working with the linux command line and also knowledge about how to create a virtual machine and install a linux operating system.
If your are planning to use Apache Guacamole in a production environment please use The Guacamole Manual, only use this guide as a complement.
Install Debian 10
Use a virtual (or physical machine) and install Debian 10. Install it without graphical interface and with ssh-server.
Create a user and give it sudo rights and then log in with SSH – if using Windows I recommend a program like Putty.
Install Apache Tomcat 9
Begin with installing Apache Tomcat 9. I used this guide from Digital Ocean. I used the latest tar-package from Apache Tomcat.
See if the installation work by surfing to your server using your favorite browser. If you see a webpage then you’ve successfully installed Tomcat.
http://IP-OF-SERVER:8080
Install Guacamole server and client
This guide is based on the Guacamole manual. Please check it out to know more about what you are doing. The most important part when installing is chapter 2 – installing Guacamole nativley.
Install dependencies for Debian
Check the manual what dependencies you may possible need – below is for basic SSH, VNC and RDP support.
$ sudo apt install libcairo2-dev libjpeg62-turbo-dev libpng-dev libtool-bin libossp-uuid-dev freerdp2-dev libpango1.0-dev libssh2-1-dev libvncserver-dev libssl-dev libwebp-dev make
Download source code for Apache Guacamole 1.1.0 server (guacamole-server), build and install it
Go to the download page to download the source code for Apache Guacamole 1.1.0.
You can also download it with the following command:
$ wget --trust-server-names 'http://apache.org/dyn/closer.cgi?action=download&filename=guacamole/1.1.0/source/guacamole-server-1.1.0.tar.gz'
If you are downloading some other version of the software, change the above command accordingly.
Then use the following commands.
$ tar -xzf guacamole-server-1.1.0.tar.gz
$ cd guacamole-server-1.1.0/
$ ./configure --with-init-dir=/etc/init.d
Once you have run the above configure-command, you’ll se what libraries was found and what the server supports – please see the manual, chapter 2 for more information about what this command does.
$ make

$ sudo make install

$ sudo ldconfig
Now the server should be installed. You can start it by running the following command (please note that you with this guide have to enter this command every time you restart your server):
$ sudo guacd
Download and deploy the Apache Guacamole 1.1.0 client (guacamole-client)
Move to a temporary directory.
$ cd /tmp/
Go to the download page to download the prebuilt version of guacamole client (guacamole-1.1.0.war).
You can also download it with the following command:
$ wget --trust-server-names 'http://apache.org/dyn/closer.cgi?action=download&filename=guacamole/1.1.0/binary/guacamole-1.1.0.war'
If you are downloading some other version of the software, change the above command accordingly.
Change the name of the file once downloaded.
$ mv guacamole-1.1.0.war guacamole.war
Copy the file to the webapps directory of Apache Tomcat. If you followed the Digital Ocean guide then you would use the following command.
$ sudo cp guacamole.war /opt/tomcat/webapps/
Then restart the Apache Tomcat-server.
$ sudo service tomcat restart
The above command could be different if you installed Apache Tomcat in another way.
Configure Apache Guacamole
This part of the guide is based on chapter 5 of the manual, I recommend to read it before you continue.
Guacamole’s config files are located in /etc/guacamole (the GUACAMOLE_HOME), but you have to create the directories by yourself.
Please note that the above home of configuration files can be altered – please see the manual Chapter 5.
Create the basic files and directory
$ sudo mkdir /etc/guacamole
$ cd /etc/guacamole
$ sudo touch guacamole.properties
$ sudo touch user-mapping.xml
Enter basic configuration
The following is examples of the files that works for me:
guacamole.properties:
guacd-hostname: localhost
guacd-port: 4822
user-mapping.xml: (please note that you can create md5 hashes to secure your passwords)
The second line below will be the actual login to Guacamole.
<user-mapping>

<authorize username="username" password="password">

<connection name="LinuxServer">
<protocol>ssh</protocol>
<param name="hostname">192.168.1.4</param>
<param name="port">22</param>
<param name="username">serverusername</param>
</connection>

<connection name="WindowsServer2019">
<protocol>rdp</protocol>
<param name="hostname">192.168.2.5</param>
<param name="port">3389</param>
<param name="security">nla</param>
<param name="ignore-cert">true</param>
<param name="username">serverusername</param>
<param name="password">serveruserpassword</param>
</connection>

</authorize>

</user-mapping>
Example of user entry with password thas is generated with a md5 hash:
<authorize username="USERNAME2" password="319f4d26e3c536b5dd871bb2c52e3178" encoding="md5">
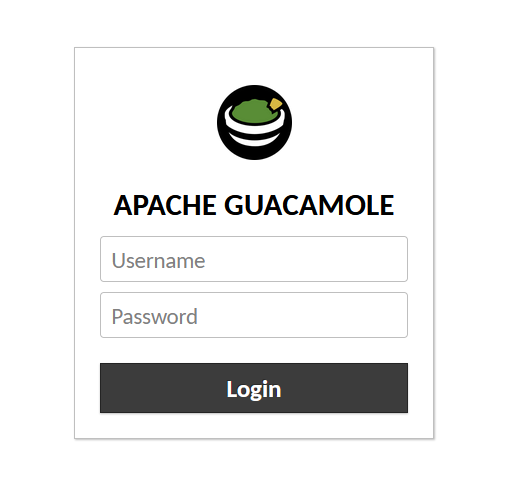
Log in to your Apache Guacamole-server
To enter your server open your favorite web browser:
http://IP-OF-SERVER:8080/guacamole
Proxying Guacamole with Apache
For more information, see the manual chapter 4.
Edit your default (or any other suitable config file) Apache configuration file (default-ssl.conf), this assumes you have a website up and running of some kind.
I strongly recommend that you use HTTPS – Let’s Encrypt is a good solution, using certbot to automatically renew your certificate.
Install the requried mods.
$ sudo a2enmod proxy proxy_wstunnel
Add the following to your default-ssl.conf (between <VirtualHost *:443> … </VirtualHost>:
<Location /guacamole/>
Order allow,deny
Allow from all
ProxyPass http://IP-OF-SERVER:8080/guacamole/ flushpackets=on
ProxyPassReverse http://IP-OF-SERVER:8080/guacamole/
</Location>
After the above text, enter the following.
<Location /guacamole/websocket-tunnel>
Order allow,deny
Allow from all
ProxyPass ws://IP-OF-SERVER:8080/guacamole/websocket-tunnel
ProxyPassReverse ws://IP-OF-SERVER:8080/guacamole/websocket-tunnel
</Location>
Also add the following to the Apache Tomcat configuration. Edit the file /opt/tomcat/conf/server.xml, add in the <Host> section.
<Valve className="org.apache.catalina.valves.RemoteIpValve"
               internalProxies="127.0.0.1"
               remoteIpHeader="x-forwarded-for"
               remoteIpProxiesHeader="x-forwarded-by"
               protocolHeader="x-forwarded-proto" />
Restart the Apache Tomcat Server.
$ sudo service tomcat restart
Also restart Apache2.
$ sudo service apache2 restart
You should now be able to access you Guacamole-site on:
https://yourdomain.com/guacamole/
Please leave a comment on this blog post if you found some kind of error or if you have some other thing to add.
Future improvements of this guide
I’m going to add information about using MySQL-server support to this configuration.

Lämna ett svar