Nestbox Project (2014)
Background
I first thought about building some kind of greenhouse, sending a live picture of my plants growing. But after a visit to Naturum, Store Mosse, Värnamo (a visitors center at a national park in Sweden) – after seeing a live screen broadcasting from a bird nest box, fetched on a tree nearby the research facility, I decided to think about maybe creating a live nest box on my own. But how? I really didn’t came up with any good technical solution for my idea, more than just connecting a web cam with really long USB cable, and it ended up like one of those ideas never realized.
But when the Raspberry Pi arrived, a little more than a year ago, I again came to think about the nest box project. How about building a nest box – with room for a Raspberry Pi, batteries and a webcam? All self sustained by a solar panel.
Project plan
This blog post is about this project. I’ve decided to make it a two year-project. Beginning this year with making the nest box, build in a Raspberry Pi with the night vision NoIR camera module, and a Wi-Fi USB-adapter, with an antenna. That’s the hardware part so far.
(To be able to run it on solar power, I will probably need one or two batteries, li-ion, a charger that works with a 2,5-3,5W solar power panel and some kind of device that could switch the Raspberry Pi between the two batteries when needed. The batteries must be able to power the Raspberry Pi for at least 10 hours and the solar panel must be able to fully charge the battery/batteries at daytime, even if it’s cloudy.)
Software: The Raspberry Pi will be running Linux Raspian and transfer the picture (or maybe a live stream) via HTTP to my web server.
What I am going to use (updated 2014-03-23):
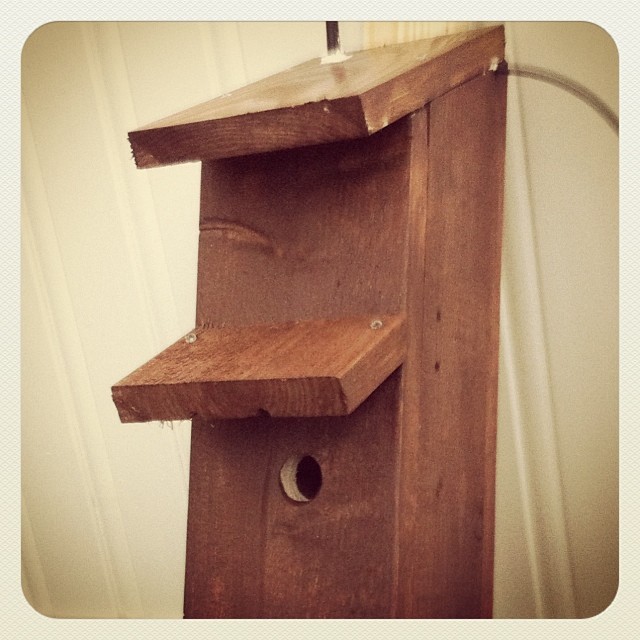
A Nest Box (yes, I made it myself)
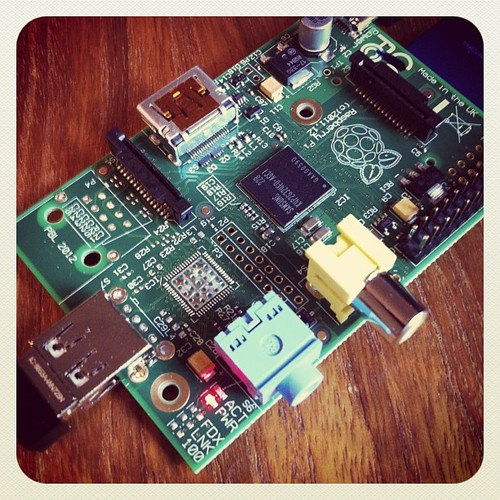
A Raspberry Pi (the stripped down type A)
Raspberry Pi 5 Mpixel NoIR camera
USB Wi-FI adapter
USB mini cable 10m
I will continue to update this blog post about the progress, and eventually, a link to the webpage with the images.
Progress:
2013-05-10 The nest box is ready and painted
2013-05-11 The Raspberry Pi Model A is ordered
2013-05-13 Raspberry Pi arrived
2013-05-14 Wi-Fi adapter ordered
2013-05-15 Wi-Fi adapter arrived
2013-05-15 Temp/humidity sensors ordered
2013-05-16 Raspberry Pi camera module ordered
2013-05-24 Temp/humidity sensors arrived
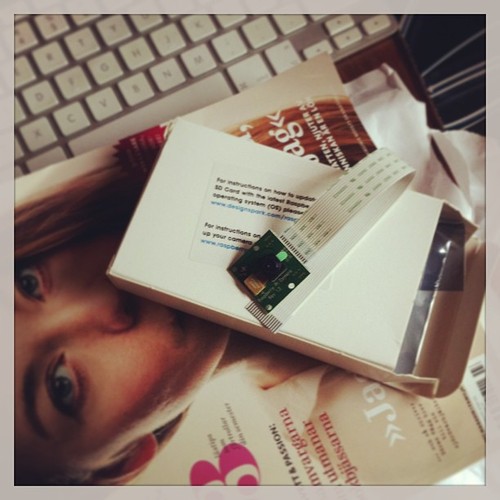
2013-05-27 Raspberry Pi camera module arrived
2014-03-23 Raspberry Pi NoIR camera ordered
2014-03-23 New Wi-Fi adapter, with an antenna, ordered
2014-03-25 NoIR camera arrived
2014-03-25 Wi-Fi adapter arrived
2014-03-28 IR LED ordered
2014-03-29 The Nest Box is ready, but not painted.
2014-04-05 Nest Box ready, painted and online.
2014-04-06 IR LED arrived
How to:
2013-05-15: The Raspberry Pi and the Wi-Fi-dongle has arrived. Followed this guide to get it everything to work with drivers and configuration of /etc/network/interfaces:
pi3g Blog – TP-Link TL-WN725N Nano WiFi Adapter v2.0 Raspberry Pi Driver
Besides this, I’m using the latest version of Raspbian. It’s a bit tricky when tweaking the model A version of Raspberry Pi, since network is not available until it’s configurated I had to insert the keyboard, edit the files, reboot with the Wi-Fi-dongle, see if it worked. If I made a mistake I had to reboot, remove the Wi-Fi-dongle and insert the keyboard again. Tried to use my USB-hub, but it did not work… You might want to use a model B Raspberry Pi to get it all to work and then insert the SD in the model A… Well, now it works and I can use it “headless” via the network.
2013-05-16: Thinking about adding a temperature and humidity sensor to the array. There is a nice one at Adafruit: DHT22.
2013-05-21: Update. The Bird Nest Box I constructed showed to be a couple of centimeters too small. I’m building a new one while I’m waiting for the camera module to arrive from R.S. Components. Also thinking about how I shall handle the data from the sensors and maybe how to post data on the web about the Raspberry Pi work load as well.
After som work with the problem I’ve set up a PHP script to access a file in a directory called nestboxdata in the directory of my web content. The file is generated at the Raspberry Pi computer every minute by cron with this command: uptime > ~/public_html/nestboxdata/uptime.txt.
Also made an FTP shell script that sends the file to the web server (to the directory above), also run by cron every minute.
I conclude that this also can be done with the images created with the Raspberry Pi camera module.
2013-05-28: Got the Camera Module yesterday. Have successfully taken a couple of pictures with it.
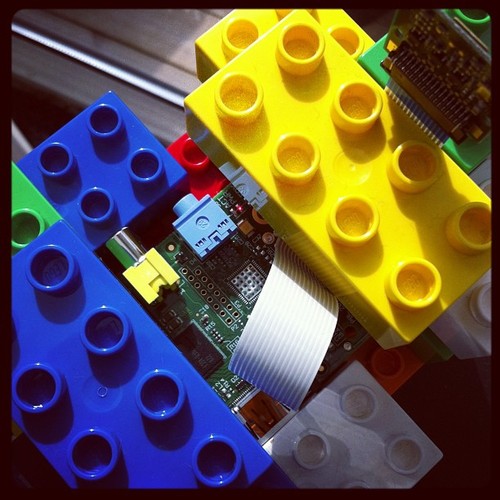
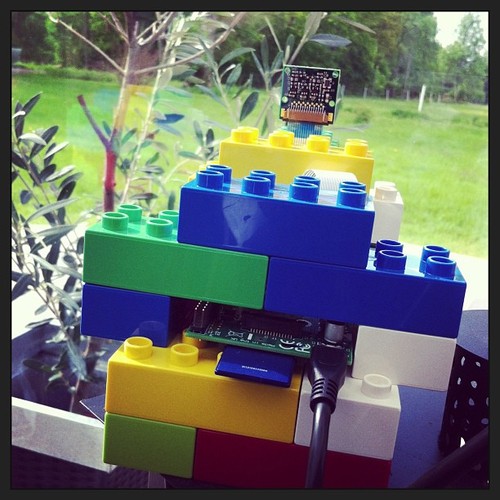
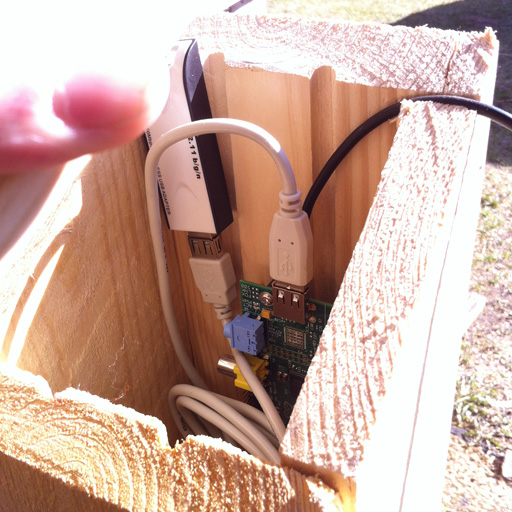
2013-05-29: To simulate actual function, I mounted the Raspberry Pi with Duplo Lego. See the three pictures below.
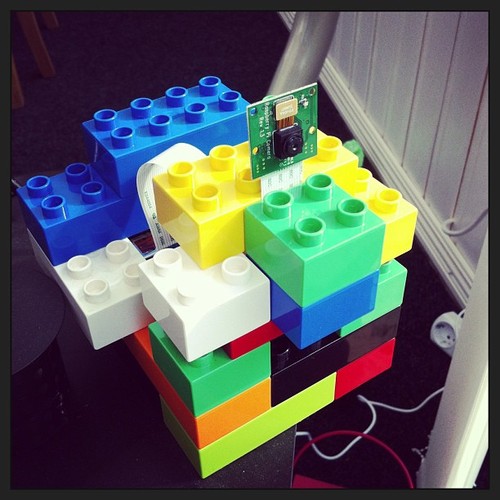
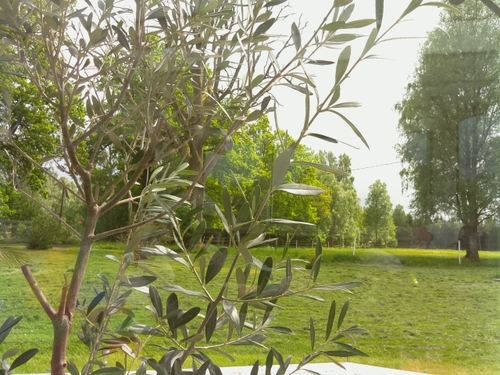
The Pi was photographing my parents garden every five minute. I set the raspistill program to save the images with the size of 640×480. Here is one of the images captured:
2013-05-30
I’m now using wget from my webserver, instead of the insecure FTP-script, to fetch the images from the Raspberry Pi. I’m sharing the files with a webserver. This works great for transfering a single file and overwrite the old. And I don’t have to have any unnecessary traffic on the Pi.
2013-07-04
I’ve been trying out the data transfer from the Rapsberry Pi to the Web server and everything works. Security issues are solved by configurating the firewall only to allow HTTP traffic to and from the web server. Since the data is made public anyway, I think the security is reasonable. No data besides the images are sent.
The last months I’ve been trying out some time lapse photography with the Raspberry Pi and the camera module. I might be using the nest box for a very long time ĺapse movie, till next year when I’m planning to be done with the construction of the box and installed the computer and the camera.
2013-10-22
As necessary configuration of the Pi is done, all I have to do is wait for spring and continue to work with the design of the Nest Box.
I can report that The Pi Foundation is making a camera board which will work in the dark and at night time. I hope it will work fine in my Nest Box aswell.
Read more about it here:http://www.raspberrypi.org/archives/5093
2014-01-21
I’ve just heard about a similar project. Read about it here.
2014-03-23
Spring is here and it’s time to finish the nest box and hang it by a tree (or a wall). I am currently doing some final tests and then I’m about to paint the nest box. I’ve just ordered a Raspberry Pi NoIR camera and I don’t know yet if I have to arrange a IR LED to lighten up the nest box while taking a picture. I’ll keep you posted about this the next few days.
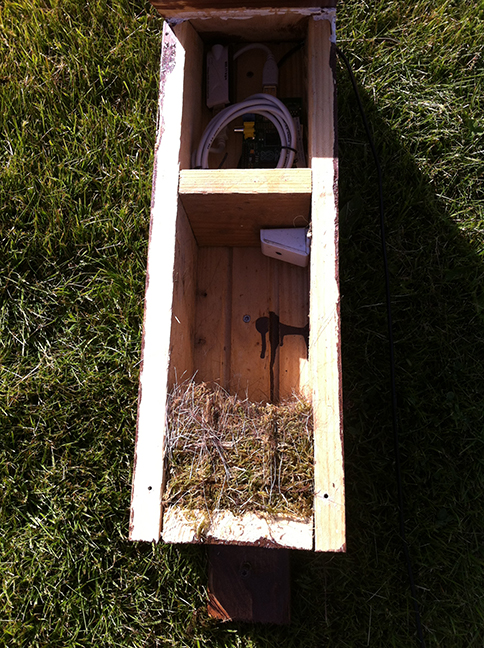
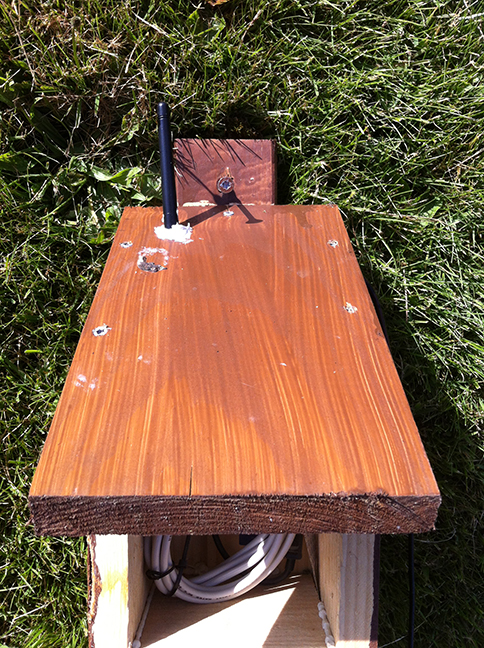
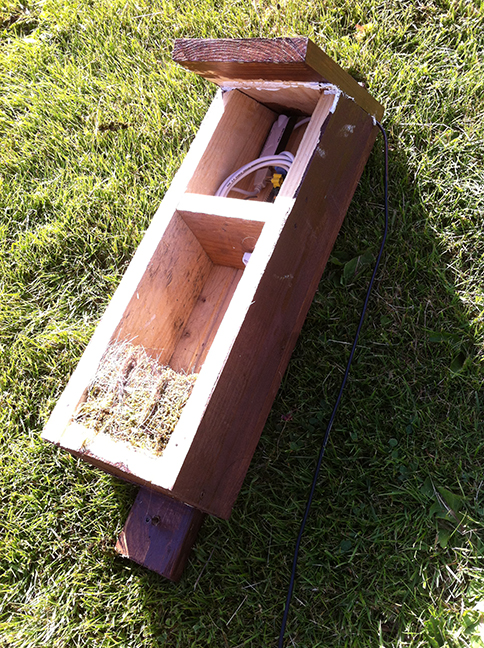
The nest box will be equipped with a Raspberry Pi Model A, a NoIR camera and a Wi-Fi USB adapter with an antenna. There will (probably) be no temp and humidity sensor this year. And no solar panel.
2014-03-26
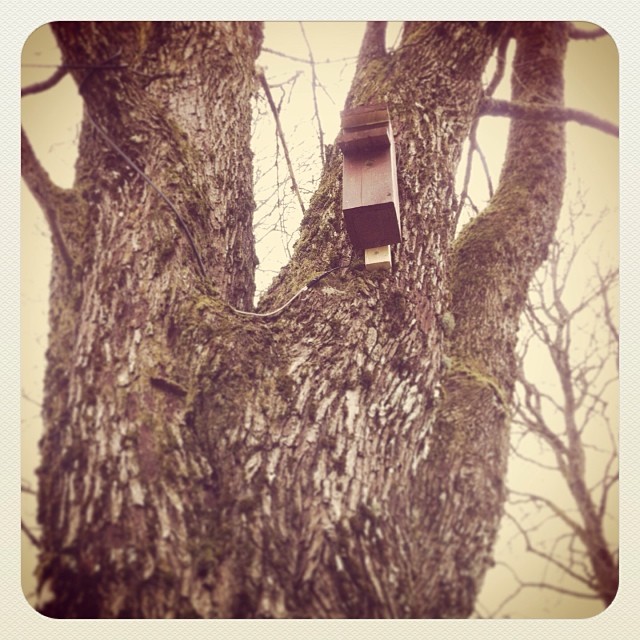
After a few modifications of the Nest Box everything is in place. Soon a live image will be available on this page. If everything goes as planned, the box will be up this weekend. Will be back with images, both external and internal, of the box.
2014-03-29/2014-03-30
I thought I had a IR LED somewhere, but I just can’t find it. So I ordered a few, along with a longer cable connecting the camera to the Pi. I guess it’ll take a couple of days before the LED:s arrives. The IR LED will work as a “flash” for the camera.
After some tests I’ve decided to skip the IR flash for now. Light coming from the nest box hole seem to be sufficient, during day time at least – and that might be enough for this project.
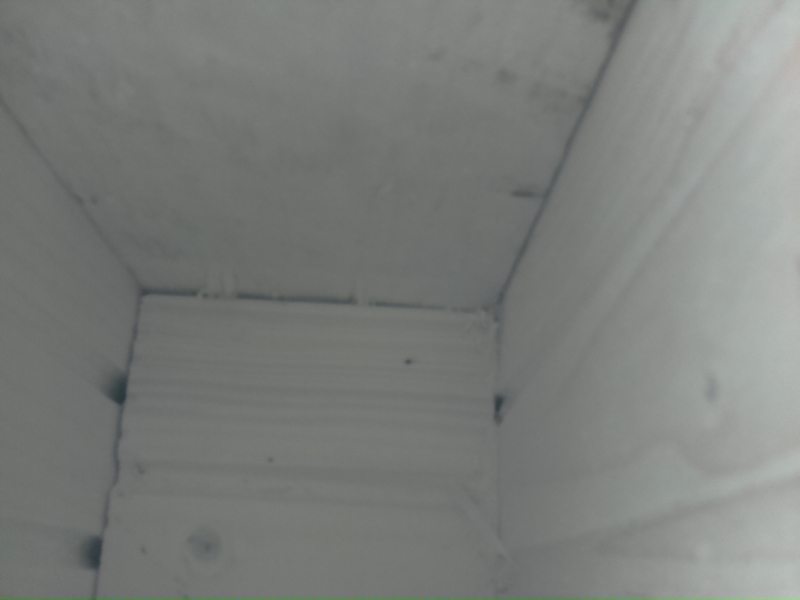
I need to adjust the angle of the camera in order to get a better picture. The resolution is 800×600 for now, I’ll increase the resolution when I do the final tweaking.

2014-04-05
The nest box is finished, and transmitting images right now. But it’s not hanging in a tree just yet, the night fell too fast this cold and rainy day. I’ll be back with some pictures.
One thing comes to my mind now, the little red LED on the camera. It lightens up the box in a strange and not pleasant way. I wonder if I can turn that off…
2014-04-06
After some fighting with Raspbian, I’m happy to inform you that the nest box is up and online! View the live image here.
The red LED indicator on the camera is annoying, but it can be turned off. Next week I’m going to follow this guide.
2014-04-07
Offline. The Nest Box went offline today, and I can’t look into it until tomorrow.
2014-04-08
Technical issues with the network connection. The Nest Box is online, but traffic from and to it is very, very slow.
Update: A script is now testing and restarting the network adapter, every two minutes. It seems to work. Right now…
2014-04-09
The Nest Box is down until further notice.
2014-04-11
Online again since yesterday.
2014-04-13
It’s a great day today when lot of sun. And the Blue Tit is building it’s nest in a fast pace. But I have not captured any picture with it today.
Found a useful tutorial on the official Raspberry Pi webpage for building a Bird Box with IR camera and IR LED. Quite simple, but it has some interesting features and also presents some useful technical information – I didn’t know that you could manually focus the NoIR camera lens.
http://www.raspberrypi.org/learning/infrared-bird-box/
One thing you should think of when building a nest box/bird box is to have a lot of space on your web server, or other connected computer. I want to save all the images so that I can use them and eventually make a time lapse movie. A few days of photographing with the nest box camera, I am way beyond 300MB of data, and I’m only using a low res setting.
2014-04-15
The pictures are very unfocused and blurred. I think it might have something to do with lack of light, and this week I’m going to try a few things to make image quality better. Sometimes the pictures have a red tone, I guess it’s because of the sun light and the NoIR camera.
I have done some improvements on the web pages today, now using full width and disabled sidebars on all pages.
2014-05-23
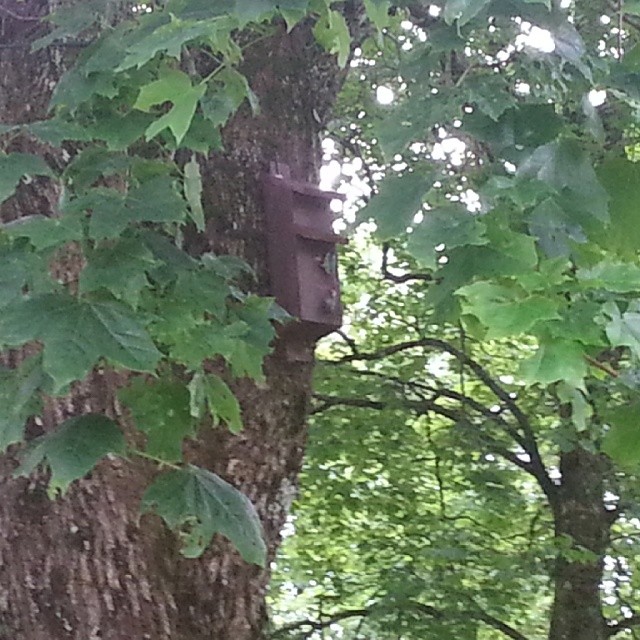
Everything is working smoothly and the blue tit chicks are growing fast.
I’m currently working on a new version of the nest box. The camera will be placed higher and I’m trying to use the ordinary Pi-camera. More about this later on.
Here is an example of what the raspivid command can do. It captures video with the Pi camera module. A kind of “zoom” effect using raspivid makes the picture a bit strange, but you can still se whats going on.
2014-06-08
The blue tit family left the nest box on 2014-06-06. Thanks for following this project.
2014-07-16
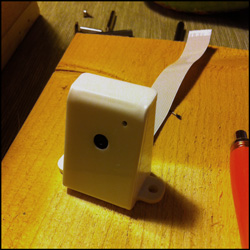
The nestbox is now taken down. Below are some pictures of the how the nest looked like:
Lämna ett svar